Solstice Sweater Beginner Friendly – Free Pattern
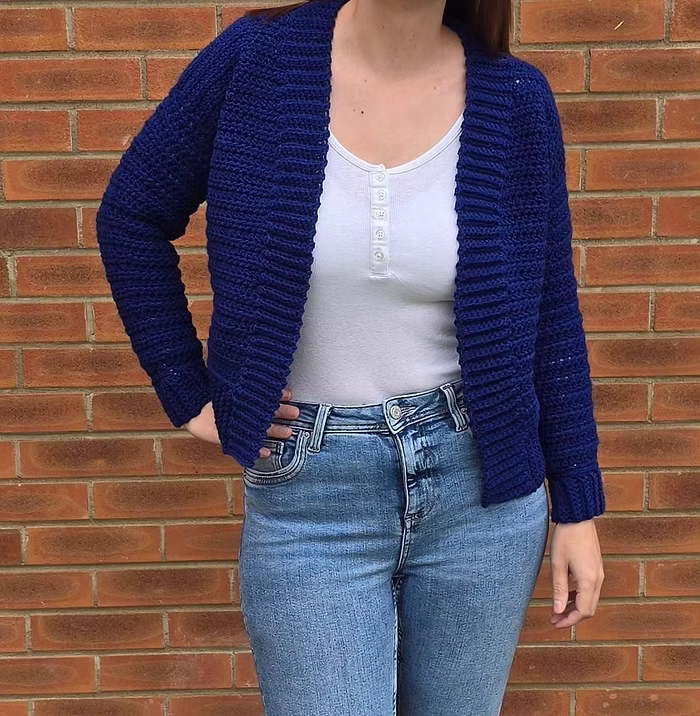
To celebrate the Summer Solstice I have decided to share a free version of my Solstice Sweater pattern. This is such a lovely project to crochet. It’s beginner friendly so if you have never made a crochet garment before you can absolutely give this one a go!
It combines simple stitches to create stunning texture and a jumper that is light and airy and perfect for cooler summer nights. I absolutely love my Solstice Sweater, it is one of my most worn handmade pieces.
If you prefer to download a pdf of a crochet pattern rather than a blog post (I do too!) you can use code SOLSTICEBLOG to save 25% on the paid version of the pattern on both my website and Etsy!
Are you ready to begin? Then let’s get to it!

What You Need
- Crochet hooks: 5.5mm and 6mm (or size needed to obtain gauge)
- a light #5 chunky/bulky or thicker #4/aran/worsted weight yarn (see notes on yarn and gauge)
- Tapestry needle
- Scissors
- Measuring tape
- Stitch markers
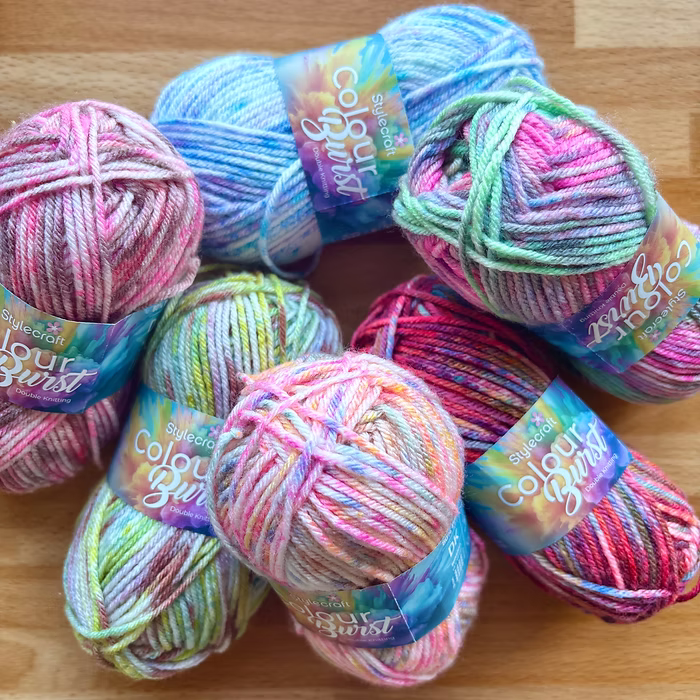
Yarn Suggestions
- KnitCraft Country Folk (a thinner 5 weight yarn)
- Yarnsmiths Pebble Haze Aran (a thicker 4 weight yarn)
- Caron Colourama Halo (a thinner 5 weight yarn)
I do recommend using a cotton blend yarn where possible as this works nicely for the transitional seasons but you can use whichever fibres you prefer. Feel free to experiment with different yarn fibres and brands but always be sure to check that you can meet gauge.
Note on Made to Measure
There is the option with this pattern to make a ‘made to measure’ version meaning that you would work to your own preferred measurements rather than the standard sizes provided. If you intend to do this then you can use any weight yarn/hook size combination that you desire and work to your measurements rather than the stitch counts provided. This would mean that you don’t need to match the gauge stated below.
Made to measure is a great option if you are between sizes or just want a more customised fit!
Yarn Amounts
Please note that these amounts are estimates based on a sweater made using Knitcraft Country Folk (320m/350yds per 200g) to the measurements given in the sizing table below.
The amount you require will depend on your tension and the yarn brand you work with but also on the length you choose to have your sweater and any adjustments you make. I would always suggest having a little bit extra than you think you will need – just in case!
| XS | S | M | L | XL | 2XL | 3XL | 4X | 5XL |
| 700m | 754m | 816m | 888m | 1024m | 1104m | 1176m | 1280m | 1344m |
Measurements
- All measurements are given in cms.
- Finished Chest (A) is measured from underarm to underarm with garment laid flat.
- Length (B) is measured from neckline to bottom of sweater.
- Sleeves (C) are measured from underarm to the end of the cuff.
- The sweater is designed with a positive ease of 10-15cm around the chest.
| In CM | To Fit Chest (circumference) | Finished Chest (A) | Length (B) | Sleeve (C) |
| X-Small | 71-76 | 43 | 50 | 42 |
| Small | 81-86 | 48 | 50 | 44 |
| Medium | 91-97 | 53 | 55 | 46 |
| Large | 101-107 | 58 | 55 | 48 |
| X Large | 111-117 | 63.5 | 55 | 50 |
| 2X Large | 122-127 | 69 | 60 | 52 |
| 3X Large | 132-137 | 74 | 60 | 53 |
| 4X Large | 142-147 | 78.5 | 60 | 53 |
| 5X Large | 152-158 | 84 | 60 | 54 |
Stitch Abbreviations
US Terms
Ch – chain
St – stitch/es
Sl st – slip stitch
SC – single crochet
HDC – half double crochet
HDC2TOG – half double crochet 2 stitches together
TR – Treble (or triple) crochet
BLO – back loop only
RS – right side
WS – wrong side
Treble Crochet
Yarn over twice, insert hook into stitch and pull up a loop (4 loops on hook), yarn over and pull through two loops (3 loops on hook), yarn over and pull through 2 loops (2 loops on hook), yarn over and pull through both loops. Stitch complete.
Gauge
12 HDC stitches x 12 rows = 10cm x 10cm (4″ x 4″)
Using a 6mm hook, ch 20.
Row 1:
HDC in 2nd ch from hook and in each stitch across. Ch1 and turn.
Row 2:
HDC in each stitch across. (19 sts)
Repeat until you have a total of 16 rows. Measure the inside stitches/rows to check your gauge
Pattern Notes
- The Solstice Sweater is made up of 4 pieces; a front panel, a back panel and two sleeves. A simple neckband and edging is added once the jumper is complete.
- The sleeves are worked independently, in the round, and then sewn onto the main body.
- Ch1 or ch2 at the start of a row/round does not count as a stitch.
- I recommend a ch2 for the treble crochet rows however you could ch3 instead if you feel that the ch2 is too short or causing your row to buckle in at the end.
- The stitch counts for each size will be given as follows: (XS, S, M, L, XL, 2X, 3X, 4X, 5X sts) If separate instructions are required for a specific size this will be made clear. Where only one stitch count is given this means that it is the same for every size.
- The treble crochet rows are worked on the right side (RS) of your work, you may wish to add a stitch marker to show the RS once you have completed your first treble crochet row.
- The Solstice Sweater is designed to have a relaxed fit with loose fitting sleeves.
- Photographic support for various steps will be available within the pattern but for ease of printing they are combined to ‘Photo Support’ pages.
Made to Measure/Adjustments
- If you are making a Made to Measure version of the sweater then you can ignore the stitch/row counts given and instead work to the measurements provided.
- Adjustments to the length of the sweater can be easily achieved by working more/less row repeats.
- The sleeves can be altered in length by working more/less row repeats. The increases can also be stopped sooner than suggested if you would like a closer fitting sleeve.
- When making a made to measure version you can use any yarn/hook combination that you like but I recommend using a hook size that is 1mm larger than that stated for the yarn so that you are more likely to get the intended drape to the finished garment.
The Pattern
Back Panel
Using a 6mm crochet hook
Row 1 (RS):
Ch 52, 58, 64, 70, 76, 82, 88, 94, 100, HDC into the second ch and in each st along. Turn. (51, 57, 63, 69, 75, 81, 87, 93, 99 sts)
Made to measure – chain until you are approximately 1.5″/3.5cm less than your intended width without stretching the chain (when you work your stitches it will stretch out and add a bit of extra width). Your stitch count will be one less than the number of chains you make.
Row 2 (WS):
Ch1, HDC in each st across. Turn. (51, 57, 63, 69, 75, 81, 87, 93, 99 sts)
Row 3 (RS):
Ch2, TR into each st across. Turn. (51, 57, 63, 69, 75, 81, 87, 93, 99 sts)
Rows 4-6:
Ch1, HDC into each st across. Turn. (51, 57, 63, 69, 75, 81, 87, 93, 99 sts)
Row 7 onwards:
Repeat rows 3-6 (TR row followed by 3 HDC rows) until you have a total of 38, 38, 42, 42, 42, 46, 46, 46, 46 rows (9, 9, 10, 10, 10, 11, 11, 11, 11 full pattern repeats) or your back panel measures approximately
47, 47, 52, 52, 52, 57, 57, 57, 57 cm
Fasten off.
Made to measure – work the same as stated until you reach your desired length. You want to end after you complete a full pattern repeat, so you will always end on a HDC row.
Front Panel
Using a 6mm crochet hook
Work up the front panel the same as for the back panel but stop when you have completed the final TR row.
You will have 3 rows less than the back panel at this point.
We will do some simple neck shaping over the next 3 rows.
Do not fasten off.
Made to measure – work the same as stated, stopping after the final TR crochet row then continue to neck shaping. If you do not wish for any neck shaping then you could work 3 standard HDC rows.
Neck Shaping – Side One
Row 1 (WS):
Ch1, HDC into the first 17, 19, 20, 22, 23, 25, 26, 27, 29 sts. HDC2TOG across the next 2 sts. Turn, leaving the rest of the row unworked. (18, 20, 21, 23, 24, 26, 27, 28, 30 sts)
Row 2 (RS):
Ch1, HDC2TOG across the first 2 sts, HDC to end. Turn. (17, 19, 20, 22, 23, 25, 26, 27, 29 sts)
Row 3 (WS):
Ch1, HDC across until 2 sts remain, HDC2TOG across the last 2 sts. (16, 18, 19, 21, 22, 24, 25, 26, 28 sts)
Fasten off leaving a long tail for seaming.
Neck Shaping – Side Two
With the WS facing, join your yarn 19, 21, 22, 24, 25, 27, 28, 29, 31 sts in from the left hand side of your work.
Row 1 (WS):
Ch1, HDC2TOG across the first 2 sts. HDC across to the end. Turn. (18, 20, 21, 23, 24, 26, 27, 28, 30 sts)
Row 2 (RS):
Ch1, HDC across until you have 2 sts remaining. HDC2TOG across the last 2 sts. Turn. (17, 19, 20, 22, 23, 25, 26, 27, 29 sts)
Row 3 (WS):
Ch1, HDC2TOG across the first 2 sts. HDC across to the end. (16, 18, 19, 21, 22, 24, 25, 26, 28 sts)
Fasten off leaving a long tail for seaming.
Made to Measurse – the neck opening may take a little trial and error but I would suggest measuring across from the middle of your collarbone on one side to the other and using that as a starting point for the gap to leave between the two sides of the neck shaping.
Sleeves – Cuff
Using a 5.5mm hook. (or a hook 0.5mm smaller than that used for the front and back panels)
If you feel your cuff is going to be tighter than you’d like use a 6mm hook.
Row 1:
Ch 10. Starting in the 2nd ch from hook, sc in each st across. Ch1 and turn. (9 sts).
Row 2:
SCBLO in each st across. Ch1 and turn. (9 sts).
Row 3 onwards:
Repeat row 2 until you have a total of 18, 20, 22, 24, 26, 28, 30, 32, 34 rows.
Join the ribbing by working a sl st in the BLO of the last row sts and the underside of the foundation chain.
Turn your work so that you can work around the top edge of the cuff.
SC into the side of each row of ribbing.
Sl st to the first SC to join, ch1 and turn. (18, 20, 22, 24, 26, 28, 30, 32, 34 sts)
You will now be working in joined rounds.
Sleeves
Using a 6mm hook.
Set up round (WS – INC):
*HDC into the first st, 2HDC into the next st* repeat from * to * around. Sl st to join and turn. (27, 30, 33, 36, 39, 42, 45, 48, 51 sts)
We will now begin to work in the same stitch pattern as the main panels – TR round followed by 3 HDC rounds. We will be increasing in the first and last stitch of the second HDC round.
Round 1 (RS):
Ch2, TR into each st around. Sl st to join and turn. (27, 30, 33, 36, 39, 42, 45, 48, 51 sts)
Round 2:
Ch1, HDC into each st around, sl st to join and turn. (27, 30, 33, 36, 39, 42, 45, 48, 51 sts)
Round 3 (INC):
Ch1, 2HDC into the first st, HDC around, 2HDC into the last st. Sl st to join and turn. (29, 32, 35, 38, 41, 44, 47, 50, 53 sts)
Round 4:
Ch1, HDC into each st around. Sl st to join and turn. (29, 32, 35, 38, 41, 44, 47, 50, 53 sts)
Rounds 5-8:
Repeat rounds 1-4 (Inc st count 31, 34, 37, 40, 43, 46, 49, 52, 55 sts)
Rounds 9 – 12:
Repeat rounds 1-4 (Inc st count 33, 36, 39, 42, 45, 48, 51, 54, 57 sts)
Rounds 13 – 16:
Repeat round 1-4 (Inc st count 35, 38, 41, 44, 47, 50, 53, 56, 59 sts)
Rounds 17 – 20:
Repeat round 1-4 (Inc st count 37, 40, 43, 46, 49, 52, 55, 58, 61 sts)
Rounds 21 – 24:
Repeat round 1-4 (Inc st count 39, 42, 45, 48, 51, 54, 57, 60, 63 sts)
Size XS stop increasing here. Continue to work another round repeat without increases until you have a total of 7 repeats/28 rounds. Fasten off leaving a long tail for seaming.
Rounds 25 – 28:
Repeat round 1-4 (Inc st count 44, 47, 50, 53, 56, 59, 62, 65 sts)
Size S stop increasing here. Work an extra 2 rounds of HDC. A total of 8 repeats/30 rounds. Fasten off leaving a long tail for seaming.
Size M/L stop increasing here. Continue to work another round repeat without increases until you have a total of 8 repeats/32 rounds. Fasten off leaving a long tail for seaming.
Rounds 29 – 32:
Repeat round 1-4 (Inc st count 55, 58, 61, 64, 67 sts)
Size XL stop increasing here. Work an extra 2 rounds of HDC. A total of 8 repeats/34 rounds. Fasten off leaving a long tail for seaming.
Rounds 33 – 36: No Increasing
Repeat round 1-4 without increasing (58, 61, 64, 67 sts)
Size 2XL stop here. A total of 9 repeats/36 rounds. Fasten off leaving a long tail for seaming.
Size 3X/4X stop increasing here and work an extra round of HDCs. A total of 9 repeats/37 rounds. Fasten off leaving a long tail for seaming.
5X stop increasing here and work an extra 2 rounds of HDCs. A total of 9 repeats/38 rounds. Fasten off leaving a long tail for seaming.
Final row count (not including set up round) should be as follows 28, 30, 32, 32, 34, 36, 37, 37, 38
You can stop increasing earlier than stated if you choose to and you can add more or less round repeats to get the ideal length for you. The nice thing about making the sleeves in this way is that you can try them on as you go. Just be mindful that as the main body is slightly oversized it creates a dropped shoulder adding a bit of extra length to the sleeve.
Seaming
Notes before you begin:
- The Right Sides of your work will always be facing each other. If you haven’t already, it’s a good idea to mark the RS of both your panels with a stitch marker.
- I recommend whip stitching as the seaming method but please feel free to do whatever you are most confident with if you usually use a different method.
- Before you begin seaming your panels together, lay your back panel down flat and line up your sleeves so that you can mark where your arm holes need to begin (the end tail of each sleeve should be orientated to the underside centre so that it will be inline with the seam).
Main Body
Lay your front and back panels side by side, WS facing you, with the shoulders lined up. Ensure that your rows are lined up as evenly as possible.
Thread your tapestry needle with a long tail, approximately 80-100cm (rather too much than not enough) and work the needle through the very edge of both panels from right to left, tying a knot to secure.
Note: If you would like to leave side slits then begin your seam at the middle HDC row of your second row repeat and seam from there on up.
You will then whip stitch your two panels together until just before the stitch marker denoting where your armhole will begin. Do not fasten off your yarn just yet incase you need to adjust your seam.
You now need to repeat the seam on the opposite side. It can be helpful to fold the panels in half towards the completed seam so that you can reach both sides easily. Ensure that the WS is always facing you.

Shoulders
Using the long tails left from the neck shaping, whip stitch along the length of your shoulders. Fasten off.
Sleeves
With the WS of your sweater facing you, insert your first sleeve through the armhole and line up the sleeve to the armhole. It should fit neatly without the need to stretch out the sleeve or the armhole too much. If your side seam needs increasing or pulling back then adjust as needed.
Using the long tail left on sleeve, whip stitch around the armhole and the opening of your sleeve. You want to ensure that you work through each stitch of the sleeve. Fasten off and repeat for the second sleeve.
Turn your sweater the right way out and double check that you are happy with how everything is seamed before weaving in all of your ends.
Neckband
With your garment RS facing, attach your yarn to the one of the shoulder seams at the neck opening.
Using a 5mm hook
Round 1:
SC evenly around the neck opening, sl st to first st to join. Ch1 and do not turn.
Rounds 2-3:
Repeat round 1
Fasten off.
Hem Edging
Attach your yarn to one of the side seams (or the bottom left-hand corner of your back panel if you left a side split).
Using a 6mm hook
Round 1:
HDC in each st around, sl st to first st to join. Ch1 and do not turn.
If you have a side split, work HDCs evenly up the raw edge of the split working a HDC2TOG across the seam, then work the same amount of HDC down the other raw edge.
Round 2:
SC in each st around, sl st to join.
If you have a side split, sl st into each HDC around the split to avoid adding extra bulk here.
Fasten off.

Congratulations, you have completed your Solstice Sweater!
I’d love to see your versions of the Solstice Sweater so please do tag me in your posts on social media @Brambles.and.Hart and use the hashtags #BHFreePatternMakes #BramblesandHart
If you are not already following me on social media then what are you doing?! I’d love to see you over on Instagram @Brambles.and.Hart, and do subscribe to my YouTube Channel which is currently undergoing a little revival!
If you would like to support me further and help me to keep creating free patterns and tutorials to share with you then do consider buying me a coffee on Ko-fi!
Happy crocheting!
Shelley ♡